Followers

четвъртък, 22 ноември 2012 г.

Snake skin II

Hello again!

This time I`ll show you another colour of the Snake Skin waterdecal decoration ->

Snake Skin II
I made this on my mother`s natural nails.
For the base coat I used Sally Hansen 330- Pedal to the Metal -> grey- purple metallic polish, applied in two coats

 Sally Hansen 330- Pedal to the Metal 

 Sally Hansen 330- Pedal to the Metal 

I have this polish and 3 more, as a prize I won in a giveaway, organized from Amanda from Amandalandish blog.
Here are all 4 ->

My giveaway prize

Back to the decoration of my mom`s mani. As I said I used waterdecals for the whole nail (the bigger two of them)

Waterdecals for the whole nail

And covered the decals with a Seche Vite top coat.

Snake Skin II


Winter 'Me To You'

Hello everyone!

I have a beautiful 'Me To You' decoration to show you today.


I made them with the Transfer technique, and I even made a step by step tutorial of their making but I`ll show it to you in some other post.

Here we have a white french with a tinny baby blue line above it on the snowie nails.
The cute bears are hand- painted with acrylic paints.
For the snowflakes I used Bundle Monster BM-323 stamping plate and white Konad paint.


I added some dots around the snowflakes and the bears using the dotting tool.
Covered with a coat of Seche Vite top coat.


Here are the nails before the UV gel refill, 31 days old, with a decoration you can see here -> Soft and delicate


I have the 'Me To You' decoration on tips from the last winter ->


And another variety of the winter 'Me To You' from the last year ->


And another from this year ->


Here we have over white sponged polish the effect Golden Rose Jolly Jewels 101.
And this time the bears are hand- painted directly on the nails.

One pic with the decoration on natural nails ->


And on short nails with only two nails ->


вторник, 20 ноември 2012 г.

Happy Feet

Hello!

As I supossed, the tips of the Happy Feet penguins got a lot of likes, and today I painted them on nails.


The blue polish I used is the same as in my previous post- Perfect S14
The penguins, as you already know from the tips, are painted with acrylic paints.


Aren`t they too cute? I love them! <3


Here is another 'pair' :), made with the Transfer technique ->


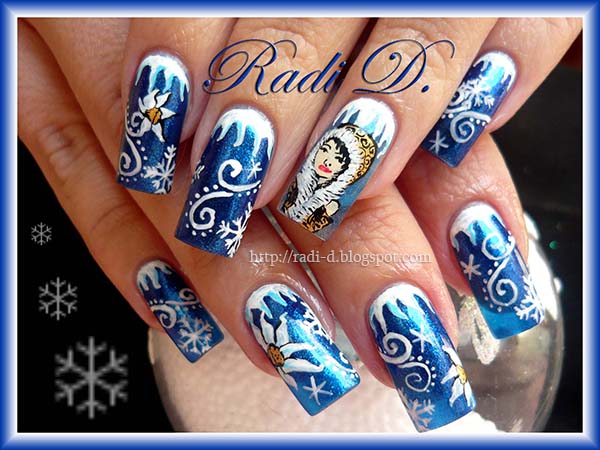
Snow Queen

Hello!

I think it`s time to focus my mind on the snowie and Christmas decorations, as the weather is already cold and Christmas is comming...

In this post you`ll see a decoration I called 'Snow Queen' ->


The polish I used for the base colour is Perfect S14 - one of my favourite blue polishes ->


The rest is all hand- painted work with acrylic paints.


And here is the same decoration made on another`s nails ->


And the last nails before the UV gel refill with the decoration you can see brand new here-> Lady In Red


And here are the blue nails with the swirls and snowflakes but without the Snow Queen and the flowers ->


понеделник, 19 ноември 2012 г.

Step by Step 'One Stroke Butterfly and Flower'

Hello!

In this post I`ll show you in step by step pictures how to make this design ->


But first- the things you`ll need for this:
Base coat, top coat, acrylic paints (I chose to make the butterfly different colour, so the colours are: white, black, yellow, light blue, dark green), dotting tool, flat and detailed brush.

1. Apply the base coat and let it dry well.

 2. Take with the two ends of the flat brush white and blue paint and twist the brush in circle over the nail to make the wing of the butterfly.

3. Make the other wing below that one the same way.

 4. Outline the wings with black acrylic paint as you stretch the black lines outside to make the wings sharp.

 5. Make the other black elements inside the wings.

 6. Continuing with the black paint. Make the body, head, feelers and legs of the butterfly.

 7. Make some tinny white lines over the butterfly`s back, head and small dots at the end of her wings over the black.
And your butterfly is ready.

8. Now for the flower. Take with both ends of the flat brush white and yellow paint and draw some petals of a flower in the one end bellow the butterfly.

 9. Outline the petals with black paint and make some tinny black lines in the base of them as veins.

 10. Make small white dots in the middle of the flower as stamens, and above the flower using the dotting tool.

 11. In the other end bellow the butterfly make a leaf using the green paint and just twist it in the end.

 12. Cover with top coat!

And that`s it! Now you know how to make this beautiful design. :) You can choose the colours for yourself. So enjoy! :)