Followers

Показват се публикациите с етикет Step by Step. Показване на всички публикации

вторник, 6 май 2014 г.

Step by Step Two coloured french & Flower

Hello!

I just realized that I haven`t posted a Step by Step tutorial from a long time.
So I`ll fix that mistake now. :)


Here is what you`ll need to make it:
- base coat, top coat, purple shimmer polish, white, black, carmin, lilac and gold acrylic paint, flat, regular and detailed brush.

And now, as usual, the steps ->

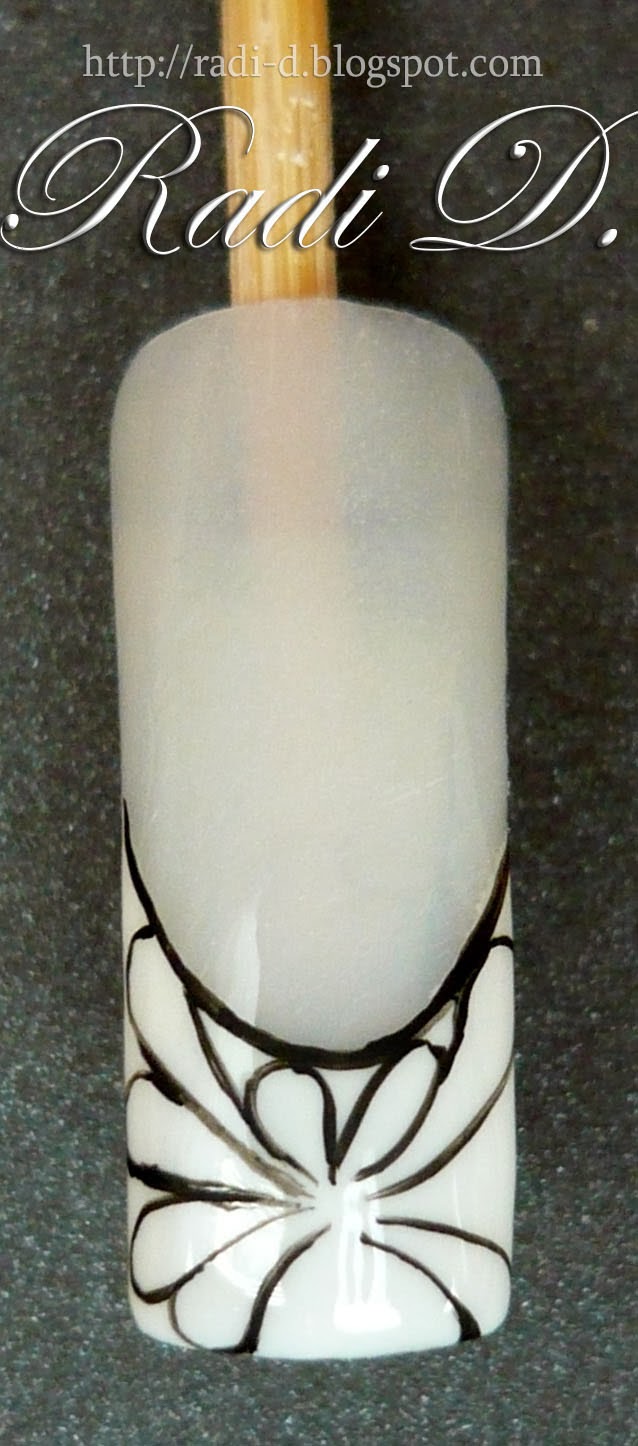
1. Apply the base coat and when it`s dry make the smile line of the french with black paint.
2. Take with both ends of the flat brush black and lilac paint and make the two- coloured french.
1.
2.


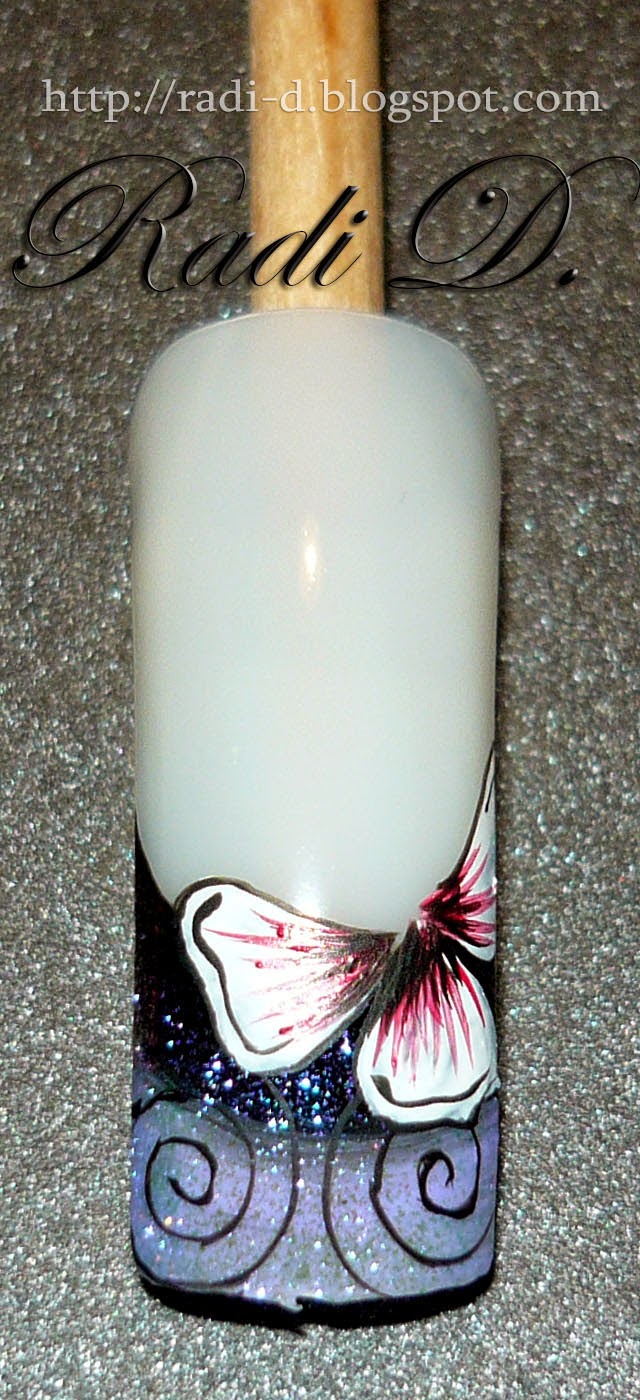
3. Cover the french with a coat of the shimmer polish.
4. Make a few swirls over the french with the thin brush and black paint.
3.
4.


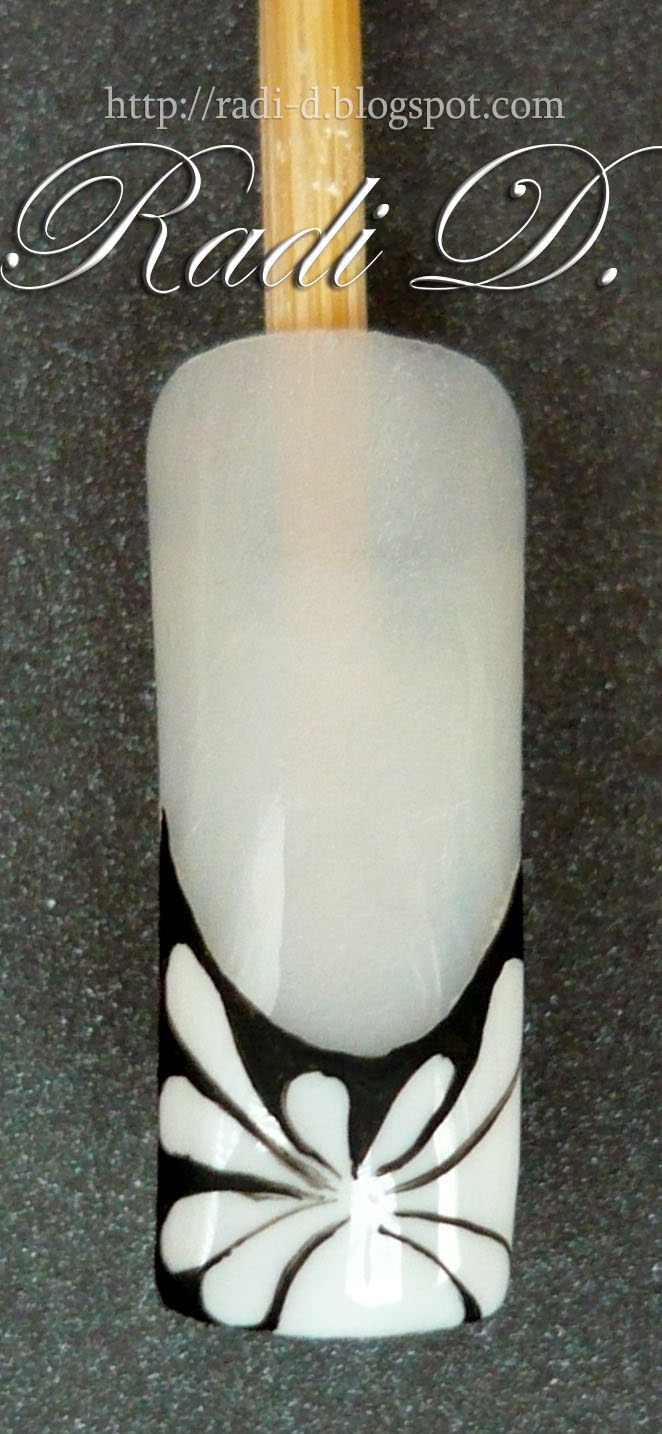
5. Use the white paint and make three leaves of a flower.
6. Make thin lines with the carmin paint in every leaf.
5.
6.


7. Outline the leaves of the flower with black paint. Make some thin black lines in the middle of the flower, too.
8. Make the gold stamen of the flower and some black wavy lines above. Cover with top coat.
7.
8.


Here it is, how it looks on the nails with a little bit different colours ->


събота, 1 март 2014 г.

Step by Step Horseshoe and Martenitsa

Hello everyone! 

As I promissed you in my previous Step by Step post, I`ll show you one more tutorial of decoration with martenitsa.


Here is what you`ll need:
- base coat, white polish, top coat, white, black, red and grey acrylic paint, regular and detailed brush.

And here are the steps:

1. Apply the base coat and when it`s dry make the white french.
2. Paint the horseshoe with grey paint above the french.
1.
2.

3. Outline the horseshoe with black paint.
4. Paint the other elements on it.
3.
4.

5. Paint the tie of the martenitsa with white paint.
6. Add the red ties, too.
5.
6.

7. Outline the martenitsa with black paint. If you want you can paint a ladybug in the spare space.
8. Cover the nail with top coat.
7.
8.


вторник, 25 февруари 2014 г.

Step by Step Four Leaf Clover & Martenitsa


A Step by Step tutorial, just in time for the upcoming holiday here in my country- 1st of March - 'Baba Marta'. We have a tradition to give and recieve martenitsi on that day so here is one idea of making a nail decoration in this spirit.

Here is what you`ll need:
- base coat, white polish, top coat, white, black, red, light and dark green acrylic paint, regular and detailed brush.

Now let`s see the steps:

1. Apply the base coat and make the french in white.
2. When it`s dry start painting the leaves of the four leaf clover with light green paint. Make the leaf heart- shaped.
1.
2.

3. Paint the rest three leaves.
4. Make the handle of the four leaf clover and some thin dark green lines in the middle of each leaf.
3.
4.


5. Outline with black paint.
6. Make the tie of the martenitsa with white paint where you want it to be.
5.
6.

7. Add the red lines to make it look like martenitsa.
8. Outline it with black paint.
7.
8.


9. Don`t forget to apply top coat as a final step!

9.

Hope you`ve enjoyed the tutorial and here is a sneak peek of what the next tutorial will be very soon ->


вторник, 18 февруари 2014 г.

Purple One Stroke Flower

Good morning!

I`m very happy today and there is no reason- isn`t it gorgeous? I wish everyone of you, my followers, to have a sunny and happy day! :)

Today I`ll show you one decoration on natural nails.


The purple polish on the non- decorated nails is Catrice Dirty Berry.
As for the decoration- it`s made with acrylic paints and the one stroke technique. You can see a step by step tutorial of how to make this flower here -> Step by Step One Stroke Flower


Finally covered with Seche Vite top coat.


сряда, 5 февруари 2014 г.

Step by Step Cherry Blossom

Hello!

Today I`ll show you an easy step by step tutorial with cherry blossom ->


And here is what you`ll need for making it:

- pink polish, black, white, pink, yellow and brown acrylic paint, flat and detailed brush, dotting tool, top coat.

As always, the steps:

1.Apply one or two coats of the pink polish and let it dry well.
2. Take with the two ends of the flat brush white and pink acrylic paint.
1.
2.


3. Make one flower in the middle of the nail as you let the white paint stay outside.
4. Make part of another flower bellow that one.
3.
4.


5. Paint the sprigs with brown paint. Make one short wavy line in the middle of the flower.
6. Using the dotting tool make some dots around the sprigs. 
5.
6.

7. Make some yellow dots above the line in the middle of the flowers.
And apply top coat.

7.

That`s it! Hope you like it and don`t forget to show your try when you do it. :)


петък, 17 януари 2014 г.

Step by Step French- Flower

Hello!

The second post for today will be a Step by Step tutorial.
I realised I haven`t posted tutorials from a long time, so here it is.


Here are the things needed:
- base coat, top coat, white polish, white and black acrylic paints, detailed brush.

And here are the steps:

1. Apply the base coat and when it`s dry make the white french.
2. Outline the smile line of the french with thin black line.


3. Outline the petals of the flower over the white french using black paint.
4. Fill in the space outside the flower over the french with black paint.

5. Make some thin black lines in the middle of the flower.
6. Paint some black elements above the french at one end of the nail.

7. Add some small white dots in the middle of the flower and around the black lines above.


8. Cover with top coat.

Have fun painting! :)