Hello!
Today I have a Step by Step tutorial for you.
It`s about how to make orchids with the One Stroke technique.
And the design is inspired by Aleksandra Lebedeva.
 |
| Step by Step Orchid |
Let`s see what you`ll need for making this design:
- base coat, top coat, turquoise polish, green glitter polish, black, white, yellow and magenta acrylic paint, flat and detailed brush, magenta ellipsoidal rhinestones.
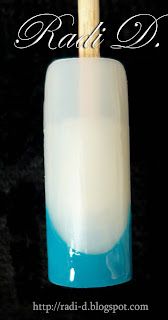
1. Apply base coat and when it`s dry make turquoise french.
2. Cover the french with the green glitter polish.
 |
| 1. |
 |
| 2. |
3. Using the flat brush and white and magenta paints make the flower` petals rotating the brush as you let the white paint stay outside.
4. Below the flower you just made make some petals of another flower the same way.
 |
| 4. |
 |
| 3. |
5. Make the third flower bellow as it`s based over the french.
6. Outline the petals of the flowers with black paint.
 |
| 5. |
 |
| 6. |
7. Using the yellow paint make the stamens of the flowers as it`s shown on the pic below ->
8. Put some black paint in the middle of the stamens and make some small black dots in every petal base over the magenta colour.
 |
| 7. |
 |
| 8. |
9. If you want you can make some asymmetrical black lines next to the flowers.
10. Place one magenta ellipsoidal rhinestone where the lines cross each other and cover with top coat!
 |
| 9 |
 |
| 10. |
 Hope you enjoy it! :)


Много красиво! Четките, с които работиш от естествен косъм ли са?
ОтговорИзтриванеБлагодаря ти! Тези специално да, но имам и от изкуствен косъм, които ползвам и от които съм много доволна :)
ИзтриванеБлагодаря за отговора!
ИзтриванеМного успехи ти желая, продължавай да ни радваш с красотите, които правиш!!! :)
И аз ти благодаря! :)
ИзтриванеI do a post about this tecnique today!! really nice tecnique btw, big kiss
ОтговорИзтриванеYes, I love that technique! :)
Изтриване